Header Home About Me Shop Freebies Contact FB IG Pinterest TPT Bloglovin email
Showing posts with label classroom. Show all posts

Wednesday, August 14, 2013

Teacher Week 2013: Now Teach! Organizing for Instruction (and a freebie!)

Today's teacher week topic is "Now Teach!". I'm gonna show you a little peek at how I organize for instruction.


This summer I made a promise to myself that I was going to get my classroom as organized as possible, so I went in a couple of weeks earlier than normal in July to get that accomplished! Needless to say, during the cleaning process things got worse before they got better (don't they always?), but now I'm more organized than ever and I am loving it! 

I got this organizational system from Lakeshore a few years back and it was one of the best purchases I ever made! I use it to organize my lesson plans and resources for the week. It's so handy because I keep it up front where I do most of my teaching, so everything is right there for me to grab and go throughout the day. As you can see from the picture... 2 days to go till the weekend!!!


On the same shelving unit is where my student's table buckets are stored. I like to keep them off of the kids' tables to provide for more space and... less distractions! I keep the basic essentials in here: glue bottles, scissors, and glue sticks. It's at their level, so it's easy for the kids to take care of their supplies on their own.


I keep most of my math manipulatives stored in this cubby shelf. I didn't make labels for these drawers like you'll see on some of my other tubs because I wanted the kids to be able to see what was inside without having to pull out the drawer. On top of the shelves are where my pencil cans are kept: one for sharp, one for dull. And can I just say that I absolutely love using the fat pencils at the beginning of the year simply because I don't have to sharpen them so often?!


See the cubby hole in the bottom right corner? That's the only part of this block of cubbies that doesn't hold some form of teaching curriculum. Why, you ask? This is where the kids keep their interactive notebooks. They can easily access it themselves and it keeps all the journals in one place so that one doesn't accidentally walk away to their house!


This shelf in the front of my classroom is where I store word wall resources, circle time games and activities, and miscellaneous calendar items -- anything used near the front of the room that I'll need easy access to. This is also where I store literacy station baskets for the week - those are the items on the bottom of the shelf. Later on in the year when we are no longer learning how to "do centers", this will be filled with a lot more baskets!


Last year, my class was very high academically and seemed to finish their work more quickly than classes I had had in the past. You know how students get when they are left to their own devices, so I decided to create this "fast finishers" crate. Each student has their own file filled with sight word readers, ABC books, roll and cover games, etc. Anytime they finished their work early, they could go to their folder on their own and choose which activity they wanted to do. They absolutely LOVED it, and I did too! It made things run so much more smoothly. It's not exactly a novel concept, but after I implemented it I wondered why I never had before!


Okay, back to my original statement at the beginning of this post -- remember how I mentioned that I had come in extra early over the summer in order to get myself organized? Well this is a big result of that organization! I cleaned out a couple of shelves in my office that had served no great purpose before and turned 2 of them into a math shelf and a reading shelf. The first picture shows you my reading resources shelf, where I keep items such as my sight word hands, magnetic letters, word work activities, and more!


This second shelf holds some of my math resources such as number stamps, spinner game whiteboards, dice, and games! It's so wonderful having everything all in one area.. no stopping to search for items because I forgot where they were!


I also organized a few of my bigger themes such as Fall, Christmas, and Valentine's Day into tubs. I bought these from Ikea last year for super cheap.


Interested in having the labels that you see in these pictures? They are available as a FREEBIE in my TPT store! Click on the picture below to download them... I am willing to update the product within reason with any other labels you need, so take a look!
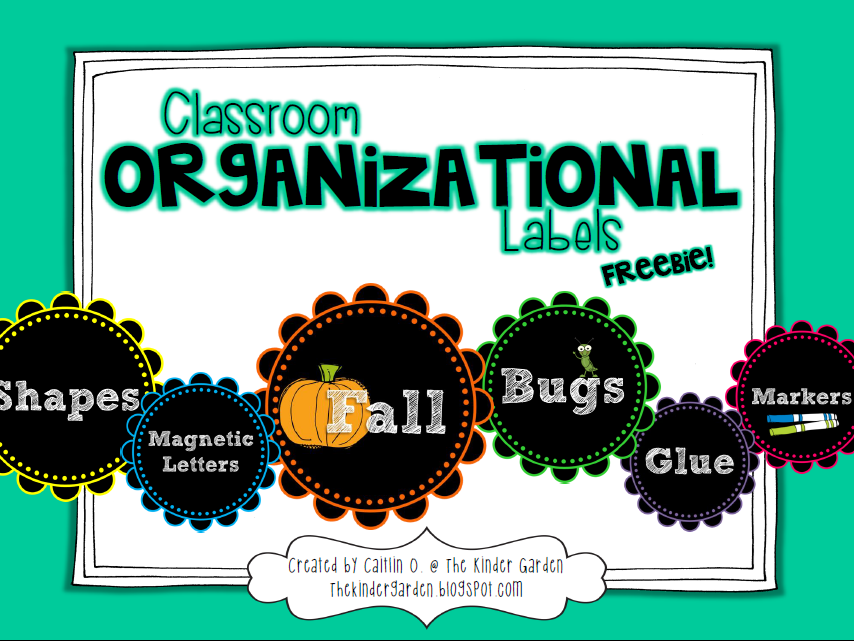
 photo ClassroomLabelscoverpage_zps1ad16802.png

I've struggled with finding a good system to store my math and literacy centers. I had been creating these manila folders with a cover page for each game, but as I've collected more, I don't like how big and clunky they are.


I was fortunate enough to receive a Wal-Mart gift card from our wonderful school PTO and bought this hanging file folder box as a new way to store my games... and pieces from Deedee Wills' super awesome Poetry Station Bundle! As you can see, I haven't put it to good use yet, but I am very excited to put it all together!


We got a new reading series this year, HM Journeys, and I love how they came in these convenient skinny tubs! It did all the organization for me! Much nicer than the two huge clunky cardboard boxes the old series came in.


Here's another fruit of my summer organization labor. For my entire first four years of teaching, I had all of my extra school supplies in one giant tub. Uh, not exactly the most handy way to keep supplies, as I had to dig through everything to actually find what I wanted. I found this awesome HUGE 5-drawer tub at Wal-Mart and finally got all my supplies in order! It's so wonderful... and easy for me to send the kids over to get an item without me having to stop instruction.


The last photo is where I need your help... I bought this great organizer from Ikea over the summer, but now that I've hung it up, I can't decide what to actually keep in it! Do you have any ideas for me? 


Link up over at Blog Hoppin' to join in on the last 2 days of Teacher Week 2013!
 photo teacherweek_zpsa94985e0.jpg

Tuesday, August 13, 2013

Teacher Week '13: Classroom Digs

Good evening! I'm back with my second post of the day to participate in Teacher Week 2013 with Tuesday's Classroom Digs: Classroom Tour. I've been in school for a week now, which means my classroom has become slightly more disheveled, but that's the way it goes! Excuse the camera phone shots as well...


I'm fortunate to have a pretty big classroom, and a glorious shared office space to boot! Here's the shot of my main area of the classroom.


This tree is a new-ish part of my classroom this year. I say new-ish because I had the tree on my wall last year, but I used it to hold incentive charts. Maybe it's just me, but I always seem to fizzle out and following up with incentive charts throughout the whole year. The days get busy, and it's the last thing I think about, or I tell the student they've earned a sticker for their chart and then I forget to put it on! So this year, I decided... no more individual incentive charts! I just am awful at keeping up with them! So I made some clothespin leaves for a cuteness factor and made it into a student work showcase tree. I love how it turned out! I could never find a great place to display student work and this was the perfect solution. And no, I don't only have 12 students... these are just the ones that did the self-portrait at Meet the Teacher Night!


 Here's a close-up of one of the leaves! The clipart I used is from the fabulous Little Red Schoolhouse. :)


Zooming back out a bit further, here's what my book center looks like. There's no rhyme or reason to it (I need to increase my book collection!), but I just wanted to make it a little cozy corner.. the kids love sitting in there to look at books.


Right next to my book center, there's a little cove of cubbies that I use to hold some of my curriculum materials. Next to that is this open shelf, which I covered with a this D-backs banner that I won at a game a few years back. Amazingly it was the perfect width for this shelving unit! It wasn't very pretty without a curtain, and this way I got to represent my favorite baseball team.


And a sneak peek behind the curtain....


Continuing my tour around the room... here's my word wall! I love my paisley border, it's adorable. Right in front of that is my writing center. The kids haven't used it yet, but when it's in full swing, we'll add vocabulary posters to the area that go with our new reading series. The plastic drawers hold different kinds of paper and alphabet resources for the kids to use. In the little shelf next door, my Ikea baskets hold resources for circle time, the word wall, and calendar time. The bottom houses literacy station baskets!


Next up is my calendar area. My magnetic pockets hold all the calendar cards and extra pieces. I created the velcro ten frame last year and it was SO helpful with teaching my kids base 10 concepts.


This shelf houses my students' table buckets of supplies, extra activities, and my lesson plan tubs for the week.


Along this wall is where I store most of my math manipulatives. The empty pocket chart will house sight word cards as we learn new words each week. We started a predictable chart this week, that's what else is hanging on the board next to my "I can..." statements.


Next to the door are these cubbies, which I've turned into a bookshelf/storage.


I organized my books a few years back, nothing fancy, but since we got a new reading series (HM Journeys), I'm going to have to revamp my book organization! The ones you're looking at in this picture are sorted by theme from the old series. This shelf holds the books the kids don't get to touch for fear of destruction... anyone else have this problem, or is it just with kinder kids...? Ha.


This is the area right behind my horseshoe table. I'm not sure what I'll be using the bulletin board for yet, but the border has more of my Eric Carle theme like I had with my book center. The magazine file holders in the shelf are empty at the moment, but that's what I use to organize my small group activities and resources. And of course I have to represent the Phoenix Coyotes... is it hockey season yet?


Last but not least, here's a glimpse into the office I share with my best buddy who teaches next door! We LOVE having this extra space... see all the shelves lining the wall on the right? I didn't take too close of a picture for fear of you running away screaming at the sight of my cluttered desk...


Oh, and in case you were wondering about the John Travolta masterpiece in the background...


Three years ago, one of our other kinder teammates discovered this incredible 70s style poster of the one and only Travolta in a discarded pile of old teaching posters, so one night after we had gone home, she snuck into our rooms and hung it up. The mustache was added by a mysterious party a year later... and we are never taking it down!!! Needless to say, we get a lot of strange looks from people who come into our office for the first time. HA!

Phew! That was a mouthful. My classroom isn't necessarily all cutesie-fied or matchy like most of the other incredible classrooms I'm sure you'll see around the blogs, but it's home. As long as it's colorful, fun, and intentional, I'm happy!

Click on the picture below to link up at Blog Hoppin'!

 photo teacherweek_zpsa94985e0.jpg

Thursday, August 23, 2012

Where I Work Wednesday : {Teacher Week}

UPDATE 8/23: I posted pictures of "where I work" last week, so here is the blog post again that I'm editing to be included in Teacher Week: Where I Work Wednesday! Enjoy!


Though I have gotten through one full week of school already, I am just now getting around to posting pictures of my classroom! I have been totally swamped the past few weeks between attending meetings, welcoming brand new teachers to my team, and preparing my own things for my class that this is the first time I've actually had the chance to sit and make a post about it. I love how it turned out! Since school is in full swing, you may notice my tables looking more scattered and scraggly with papers and student's items, but try to pretend you don't notice. ;)

So this is what my classroom looked like post-summer cleaning when I first came back in July...

...And ended up looking like this by the time Meet the Teacher Night rolled around! Much better!

This is my book center. I love how it turned out. I accidentally ended up with somewhat of an Eric Carle theme in my room that began when I innocently bought a set of The Very Hungry Caterpillar nametags for my students... and then I ended up making this giant tree, which now houses my kids' incentive charts.

Here's a closer view of the incentive tree...

And these are the charts that are hanging from the branches! How fun!

Next here's my word wall, that I always do a good job of adding our sight words to at the beginning of the year but not so much as the year goes on... it's my goal to be better at that this year!

In front of that is my writing center table that I had to make smaller this year because I have way more students in my class than last year - I had to make it only one table so I could use the other one for my extra students. I bought the 3-drawer thing this year in an attempt to keep my papers more organized for my students to use!

Here's my calendar set-up. I made the red ten frame template (found it on pinterest) since that has been a huge push with the new common core. I'm just going to put velcro on the back of some red/yellow counters and put one up there for every day that we are at school for the month. As you can see I haven't quite finished making it as there is nothing on there and we have been in school for 7 days, haha.


This is where most of the technology happens - desktop computer, laptop, document camera. How did I EVER teach kindergarten without a document camera?? Lifesaver for modeling!


Finally, on the first day of school I noticed some mysterious mustaches that had appeared in my room - I went to tell the kids "rule number 5" on the first day and did a double take when I saw my mustachio'd friend! Then the kids found another one on our line-up poster. It was really my neighbor teacher's boyfriend that was the culprit, but a few of my kids came to the conclusion that it was done by the "Mustache Maker" and he was a bad guy that leaves mustaches everywhere. HA! That's a good enough explanation for me!


So there it is! Thanks for joining me on a tour around my classroom. I've loved seeing what everyone else has done in their rooms so far, too, on various blogs. My class is off to a GREAT start so far with their behavior! Hope it continues!

Thursday, September 22, 2011

Back in action... finally!

Phew! So I finally hunkered down and set up/installed the internet at my new place. I've been about a month and a half without... hence the sparse updates. But I've been taking loads of pictures at school in hopes that I would one day be able to share them with you... and I have some freebies for you to make up for lost time!

This year's class is exhausting, but I love 'em. I love getting into this part of the year where I don't have to dwell as much on teaching them every single routine and I can start on a lot more fun projects for them to do now that they're "used" to going to school.

Here's a little update on what's been going on. Sorry for the poor quality; all I've had is my phone to take pics!:

So when school started a little over a month ago, my room began like this.....

And then slowly added these next pieces to finally all come together...


 And a sweet parent brought me these cake pops at meet the teacher night! Aren't they cute? And they were SO yummy... I was so surprised, I've never gotten a gift right off the bat before! So thoughtful!


I love how every year, my kids just adore center time. It's the most fun for me, too! They get so into the little stations each week. Last week I set up the "Mixed Up Alphabet" center. I had a big basket of magnetic letters that they had to put in order on a magnetic shelf. Once they ordered it, they filled out the recording sheet with the missing letters. Click the picture of the worksheet below to download! (Graphics courtesy of Scrappin' Doodles)

And here are my kids actually completing the center... they loved using the big letters. :)


Finally, we just started our Colors unit in reading, so I made a color word center to go along with it. Click here to go to Google Docs and download!

Next time I'll share a little bit more about some of the activities I've been doing in my classroom. I can't believe it's already the end of September! Where have these first 2 months gone??